Input File Editor
Edit input files for the calculation engine on the right-side panel of the project view. Select an editor mode that corresponds to the type of calculation you’d like to perform from the menu  located in the lower right corner. Then, set the required values by referring to the calculation engine manual.
Some of the setting items have a default value button  . Click this button to restore the settings to their default value.
Some items to specify a file have a text file icon  . Click on the icon to view the content of the file.
For settings with the Advanced Settings button  , clicking the button will open the Advanced Settings dialog.
Some of the setting items are collapsed and not visible. You can expand them by clicking on the right-pointing triangle icon  .
.
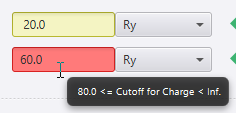
A yellow input field indicates that the value is not appropriate. A red input field indicates that the calculation with the given value cannot be performed (result in error). To view the possible range of values, hover your cursor over the input field. Additionally, you can right-click on the input field for options like undo etc.
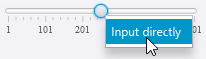
In addition to manipulating the slider with the mouse, you can directly set the slider’s value from the Input directly menu in the right-click menu. Some sliders also offer an Extend the domain option in the menu to extend the range of values.
There are additional explanatory notes available for certain setting views. You can access these supplemental descriptions through the following links.
Built-in text editor
Open the Input-file from the menu on the lower left to review the input file in text format that will created.
Click the reload button  to update the modified items from the right-side panel in the text editor.
You can also make direct edits to the text of the input file using the text editor. Click the up arrow button  to apply the changes to the right-side panel.
Note
The text editor does not directory open the actual input file; it only displays temporary text generated from the setting items. To update the actual input file, click the up arrow button, and then save the project. If you don’t click the up arrow button, the text will not be reflected in the actual input file, even if you save the project.
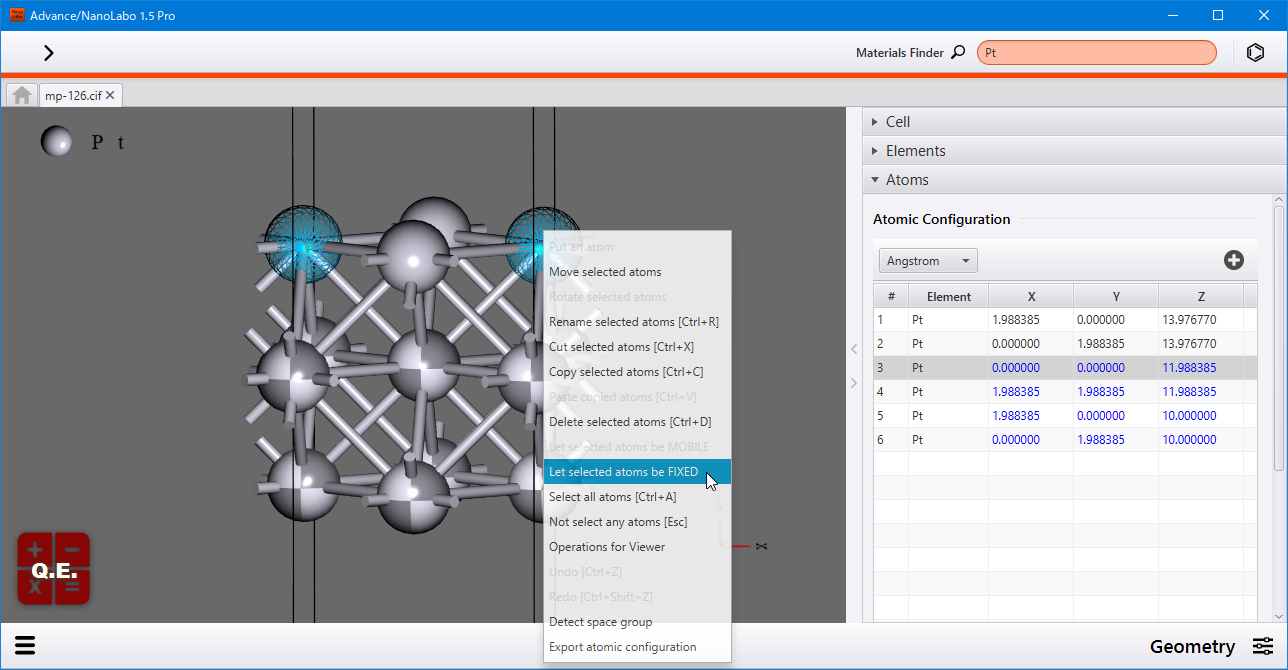
Let atoms fixed / mobile
In structure optimization or molecular dynamics calculations, it is possible to fix coordinates of specified atoms.
In the viewer on the left side, right-click the atom you wish to fix. You can select multiple atoms by Ctrl + drag (deselect by Ctrl + right drag). The chosen atom(s) will now be displayed in wireframe style. To fix the selected atoms, click Let selected atoms be FIXED from the menu. Fixed atoms will be shown with a checker pattern. To make the fixed atoms mobile again, choose Let selected atoms be MOBILE from the menu.
To check or set the fixed / mobile settings for each direction, open the Geometry from the lower right menu , and navigate to Atomic Configuration under Atoms. The fixed coordinates of atoms are displayed in blue letters. You can set fixed / mobile along X/Y/Z direction using the right-click menu of the rows of atoms.