How to Install (Linux)
Preparation
Installation of this software requires three separate installers. Please download each installer from the links below.
Main Program
Open Source Calculation Engines, etc.
Additional GNN force field model files (Required only if using FAIR-Chem or SevenNet)
Note
Ensure that you install NanoLabo Tool on the same machine where NanoLabo is installed, even if you intend to run calculations on a remote machine.
The Java Runtime Environment is bundled with the installer. It will be transferred to the designated installation directory during the installation process.
Installation
Open a terminal and navigate to the directory containing the installers. After granting execution permissions, start by running the Advance/NanoLabo installer.
$ chmod +x install_nanolabo_linux.bin
$ sudo ./install_nanolabo_linux.bin
Note
Root privileges are required to install the License Manager (Sentinel-LDK-RTE).
It can also be run by a standard user if the installation of Sentinel-LDK-RTE is not required (e.g., it is already installed).
If a language selection window appears, choose a language for the installation process (note that this selection does not determine the language used within the software itself).
Proceed by following the on-screen instructions to configure the installation.
Note
You cannot install the software in a location without write permission. Ensure you choose the location with write permission (e.g. /home/username/AdvanceSoft/NanoLabo ) as the installation destination, or execute the installer as the user with write permission.
If you are using the software as a client with a floating license, select No for ‘Install Sentinel-LDK-RTE?’ (this confirmation prompt will not be displayed if run by a standard user).
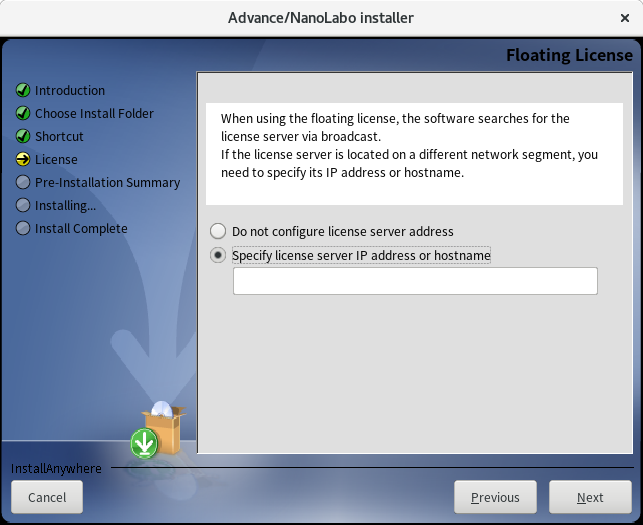
If the license server is on a different network segment, please enter its IP address or hostname on the next screen. Even if not specified here, it is possible to configure the license server IP address or hostname later. For details, see Floating license.
Once the configuration is complete, a summary window will appear. The Install Folder will be required when installing the Advance/NanoLabo Tool. Please make a note of the install folder.

At the final window, click “Done” to complete the installation of Advance/NanoLabo.
Next, run the Advance/NanoLabo Tool installer.
$ chmod +x install_nanolabo_tool_linux.bin
$ ./install_nanolabo_tool_linux.bin
Follow the on-screen instructions to configure the installation. Ensure you select the same location for the installation destination as you did for Advance/NanoLabo.

At the final window, click “Done” to finish the installation of the Advance/NanoLabo Tool.
If using FAIR-Chem or SevenNet, please install Advance/NanoLabo GNNP similarly.
Launching
If you created a shortcut during installation, you can launch the software using that shortcut.
To launch the software directly, open a terminal, navigate to the bin directory within the install destination, and then execute nanolabo.sh .
$ ./nanolabo.sh
On initial launch, a license dialog will appear. Please follow the procedure here to set up the license.
If 3D models aren’t displayed
You can add a Java VM argument to address the display issue.
Click on the main menu icon ![]() located in the upper left. Then, navigate to , and append
located in the upper left. Then, navigate to , and append -Dprism.forceGPU=true to the Arguments for Java VM. Then, click OK and restart NanoLabo.
Additional Settings
Materials Finder API Settings
Configuration of an API key is required to obtain crystal structures from the Materials Project. For the configuration method, please see here.
Configuration for graph neural network universal force field
To use graph neural network universal force fields in LAMMPS calculations, additional setup in a Python environment is required. For the configuration method, please see here.
Configuration for versatile tight-binding method (ThreeBodyTB)
To utilize the versatile tight-binding method (ThreeBodyTB) calculations, additional settings in the Julia environment are necessary. Please refer here for the detailed setup instructions.
Setting up for remote calculation
To submit calculation jobs from NanoLabo to a remote machine, you’ll need to establish an SSH connection. Please refer here for the detailed setup instructions.
Update/Upgrade
When upgrading from the trial version to the full version, a new installation is not required. Please update only the license, referring to License Update.
When updating to a newer version, you can install directly over the existing version.
When updating to a new major version of NanoLabo, a license update is required. Please update the license, referring to License Update.
If a newer version of NanoLabo Tool is available along with NanoLabo, it is recommended to update both. NanoLabo is designed to be used in conjunction with the calculation engines provided in the latest version of NanoLabo Tool.
Your software configurations and any projects you have created are stored separately from the installation directory. This ensures that you can continue using the software seamlessly, even after the update.
Uninstallation
In a terminal, execute Change NanoLabo Tool Installation located in _NanoLabo_Tool_installation directory at your installation destination.
$ AdvanceSoft/NanoLabo/_NanoLabo_Tool_installation/Change\ NanoLabo\ Tool\ Installation
Follow the on-screen instructions to proceed with the uninstallation.
After uninstalling Advance/NanoLabo Tool, similarly uninstall Advance/NanoLabo GNNP and Advance/NanoLabo.
Note
During uninstallation, installation log files may remain. Also, if you were using an old license, the license files will not be deleted. In such cases, please delete these files manually.
Note
Configuration and projects created by this software are saved in a location separate from the installation directory ( home directory/.nanolabo ). These files are not deleted during the uninstallation process. If you wish to remove them, please do so manually.
Note
To uninstall Sentinel-LDK-RTE later, please run dunst, which is included in the Sentinel-LDK-RTE installer.